Your current blog is retired from the Growbig program of the Siteground host.
In this article, you will understand:

The advantages and disadvantages of the siteground host
Siteground host It is one of the most popular hosts in the WordPress community and one of the consoles recommended by WordPress.Siteground is loved by high-quality services such as 24/7 customer service, automatic PHP update, system-level optimization and acceleration, free CDN and SSL security certificates.
The “Guidelines for Life in the United States” you are currently visited are custody Siteground host EssenceThe characteristics of the siteground host are as follows:
advantage
- The host server is first-rate: All Siteground host servers are optimized by speed, using the most advanced hardware devices, such as SSD hard disks, and so on.At the same time, the host provides System-level cache And optimization, optimize and cache settings for the WordPress website on the host side, allowing your website to achieve the fastest page loading speed;
- 24/7 customer service: Provide customer service services throughout the day.Customer service services include telephone, online chat, and TICKET-based problem solving steps;
- Free CDN and SSL: Siteground host provides free content distribution network (CDN) and Socket Secure Layer (SSL) security certificate.CND provides data storage of connected hosts around the world, allowing the website to achieve the fastest acceleration speed in all parts of the world.SSL certificates provide safe data transmission, making the website more preferred by search engines;
- There are multiple data centers in the world: Multiple data centers are available.You can choose the most suitable data center according to the resistance where the website visitors are.Whether you are in any place in China, the United States, or Europe, you can find the right data center;
- 100%reliability: The online rate reaches 100%, which can ensure that your website is always online;
shortcoming
- If you choose to pay monthly, the price will be much more expensive than the year.Therefore, if you have decided to operate your website for a long time, it is best to choose a relatively long-term host service.
How to apply for Siteground host?
Please follow the four steps below to apply for Siteground host account:
- Step 1: Select the host type
- Step 2: Select whether to buy the website domain name
- Step 3: Complete the information input and complete the purchase
- Step 4: Add domain name to the host
step one: Choose the host type of purchased
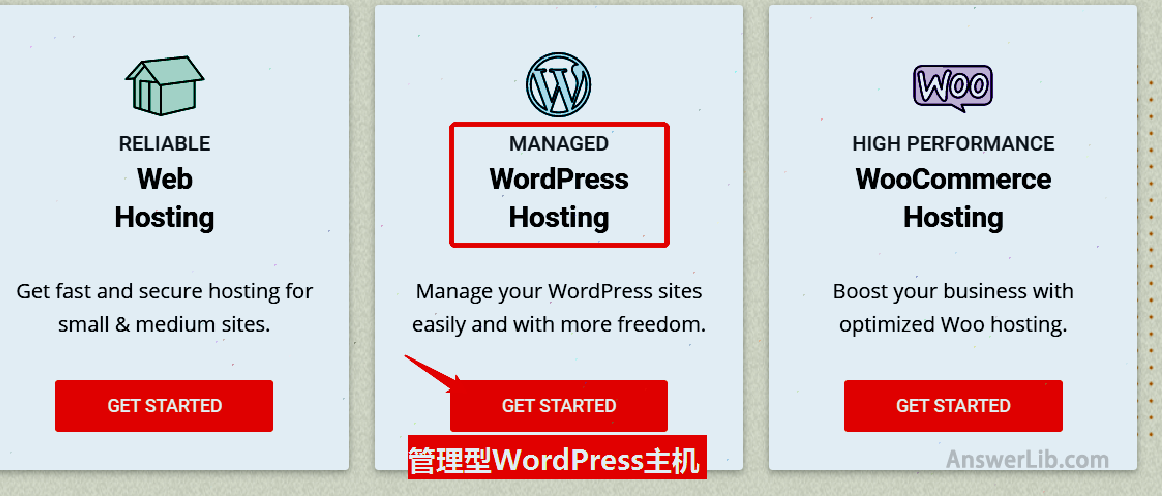
Enter Siteground host For page, select [Managed WordPress Hosting], that is, the management WordPress host, which is specially customized for WordPress.
Related Reading:How to choose five different host types?
Click the button [get started] to start the application.
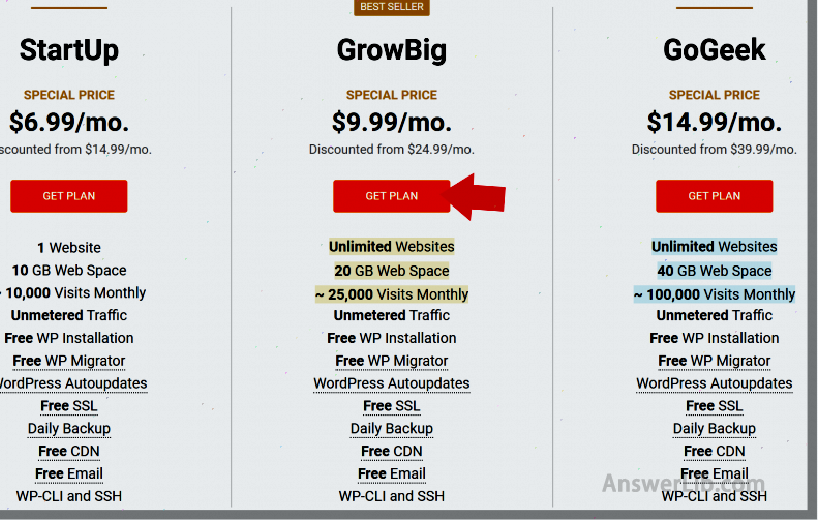
In the following interface, you have three paid plans to choose from: Startup, Growbig, and Gogeek.
- If you just come into contact with WordPress, you can consider Startup ($ 6.99/month);
- Growbig ($ 9.99/month) is the best cost-effective host choice; your currently visited blog relies on the Growbig program;
- Gogeek ($ 14.99/month) is suitable for more large websites, such as large WHOLE SALE websites;
We are most recommended in the middle, Growbig, possess System-level cache And optimization, all the configurations of the website are accelerated on the host side, and the price is also fair.The most important thing is that for a Growbig account, you can support Holding an infinite website, Very cost-effective.
Click [Get Plan] to start the application Growbig EssenceYou can also choose Startup or Gogeek, which are basically the same.
Step 2: Choose whether to buy the website domain name
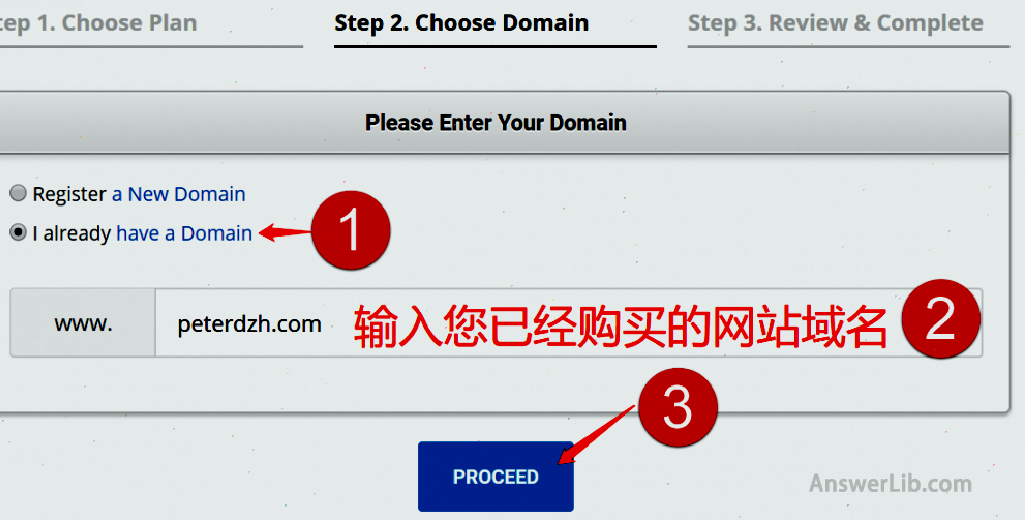
Select the website domain name.If you have no website domain name, select [Register A New Domain]; otherwise, select [I Alream Have a Domain].
Related Reading: If you have not applied for a website domain name, please go from Namecheap For applications, please refer to the specific operation steps “Detailed Explanation of NameCheap Application Website Domain Name” Essence
In the figure below, select the second [I Already Have a Domain].Enter the domain name you already have, and click [Proceed].
Step 3: Complete information input and complete the purchase
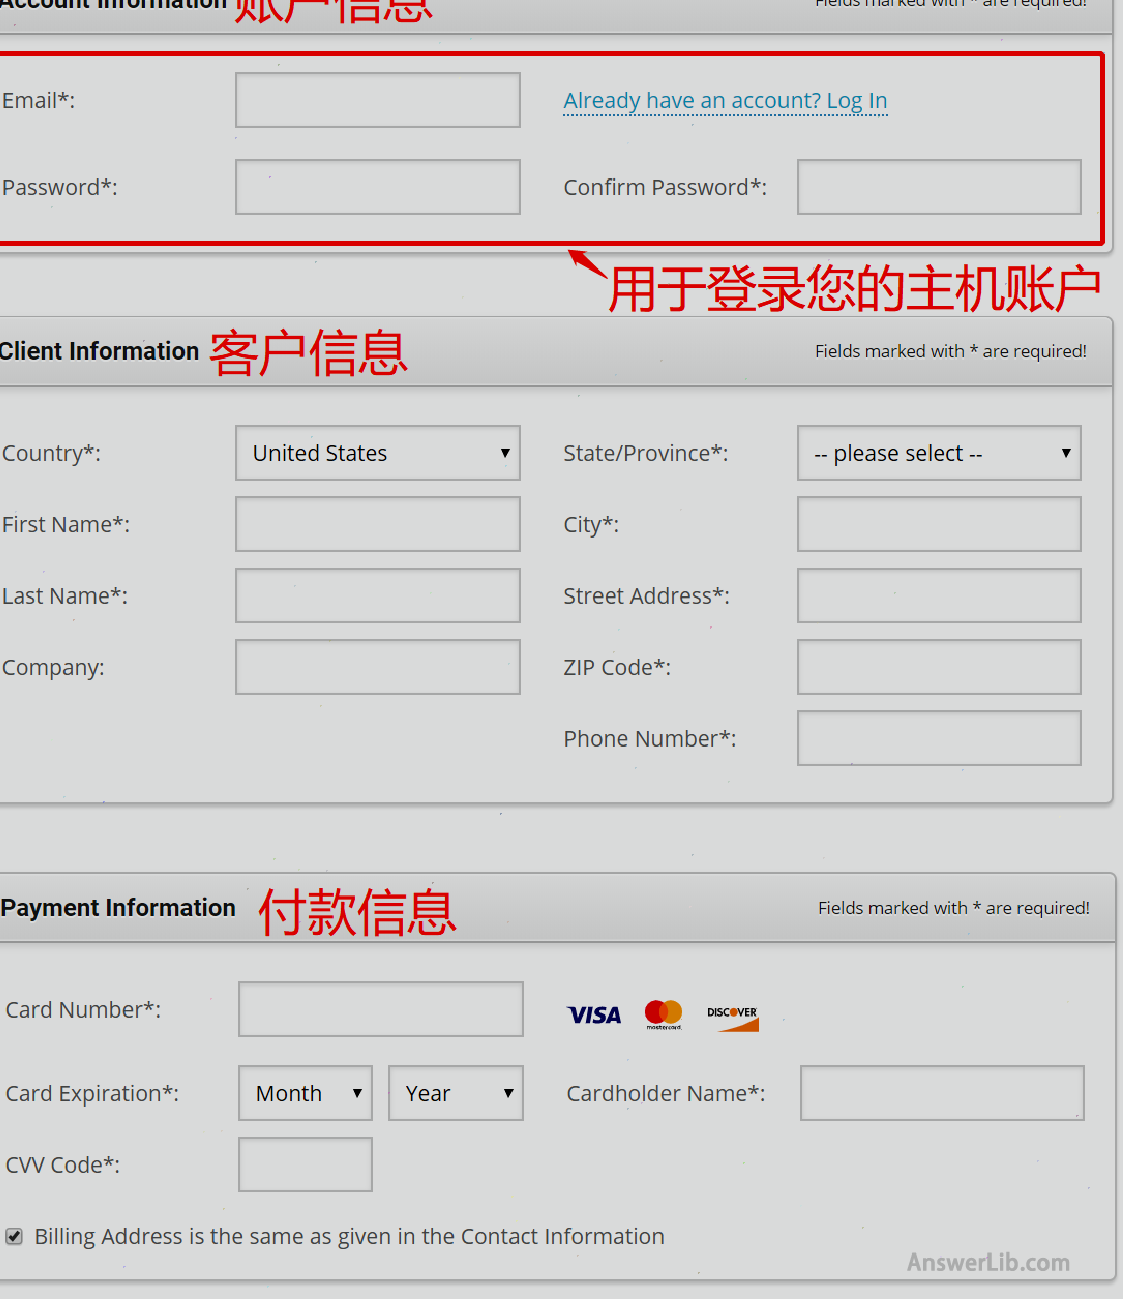
Enter account information, client information, and Payment Information.
Account information: For your password for your password for your SiteGround host account.
Payment information: You can use commonly used credit card payment:
On the same page, roll the mouse and continue to set the host type:
- Choose the time of using the host: You can choose to try one month ($ 29.99), 1 year, 2 years, or 3 years.You can choose according to your need.Here for 1 year as an example, choose 12 months, the monthly price is $ 9.99.
- Then select the host data center address: Singapore, Australia, the United States, Europe, Germany, Britain.The basic principle of selection is: For the source of website visitors, choose the right data center.For example, if your website is mainly targeted at U.S.customers, then you should choose USA.Similarly, if your customers are mainly distributed in Asia, you can choose Singapore.
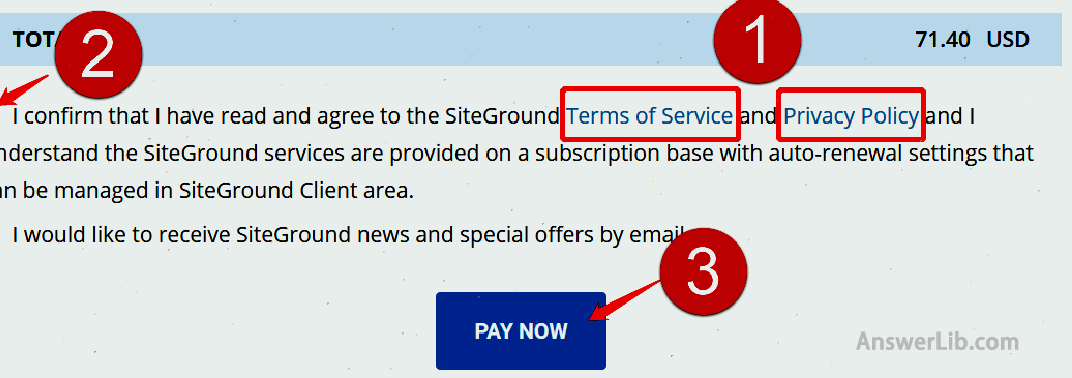
Still on the same page, roll to the bottom of the page, as shown below.Please read the [Terms of Service] and [Privacy Policy].If you agree, please click on the (2) in the figure below, and finally click [Pay Now] to complete the payment.
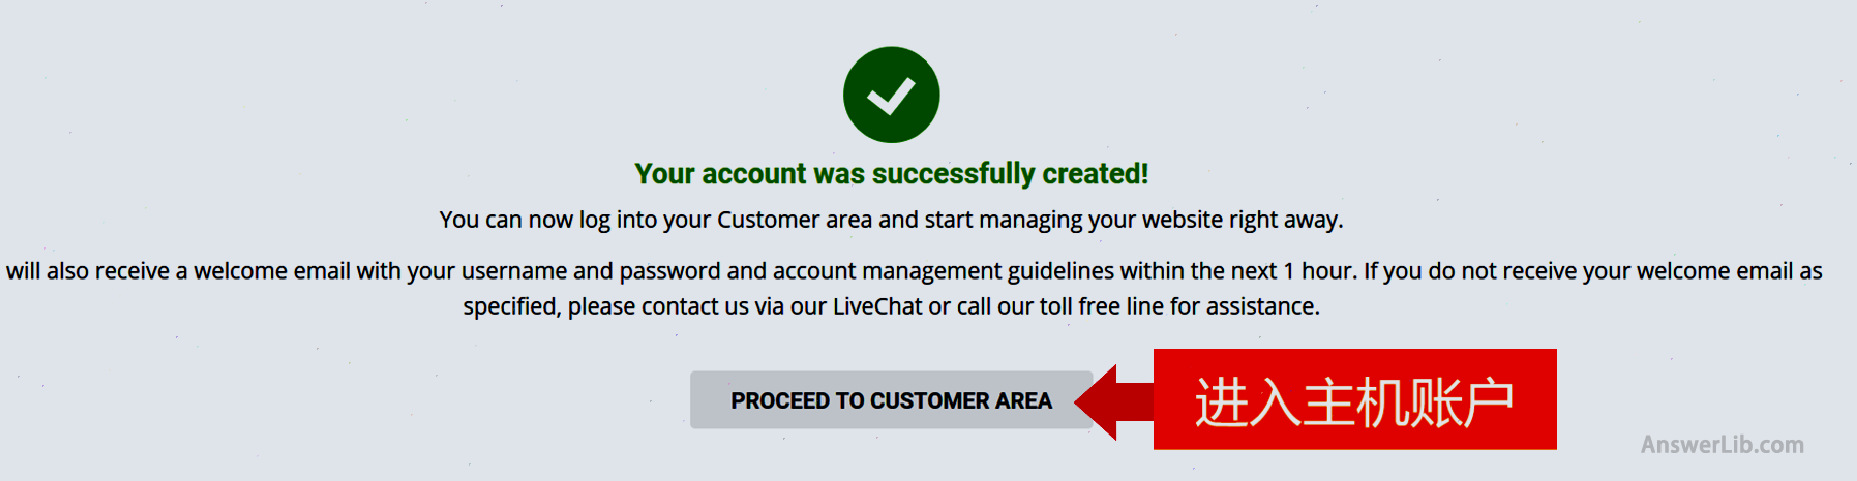
Congratulations, so far you applied for your own WordPress host.In the figure below, click [Proceed To Customer Area] to enter your host account.
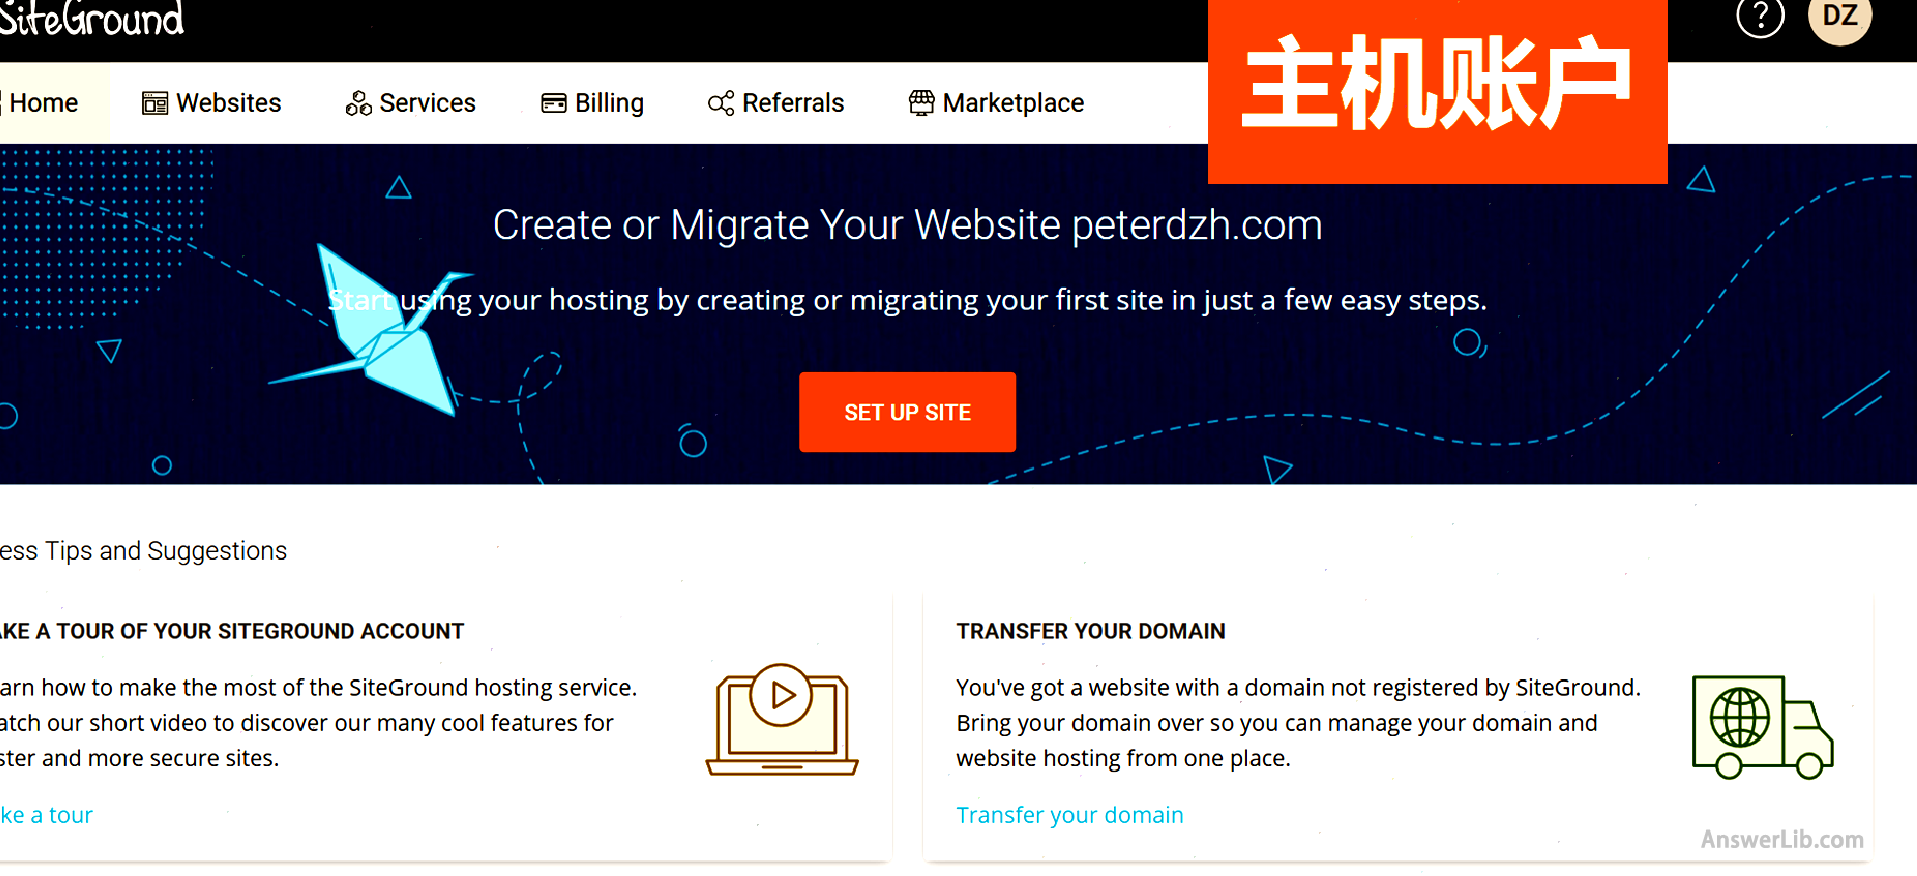
The following is your host account interface:
Step 4: Add domain name to the host
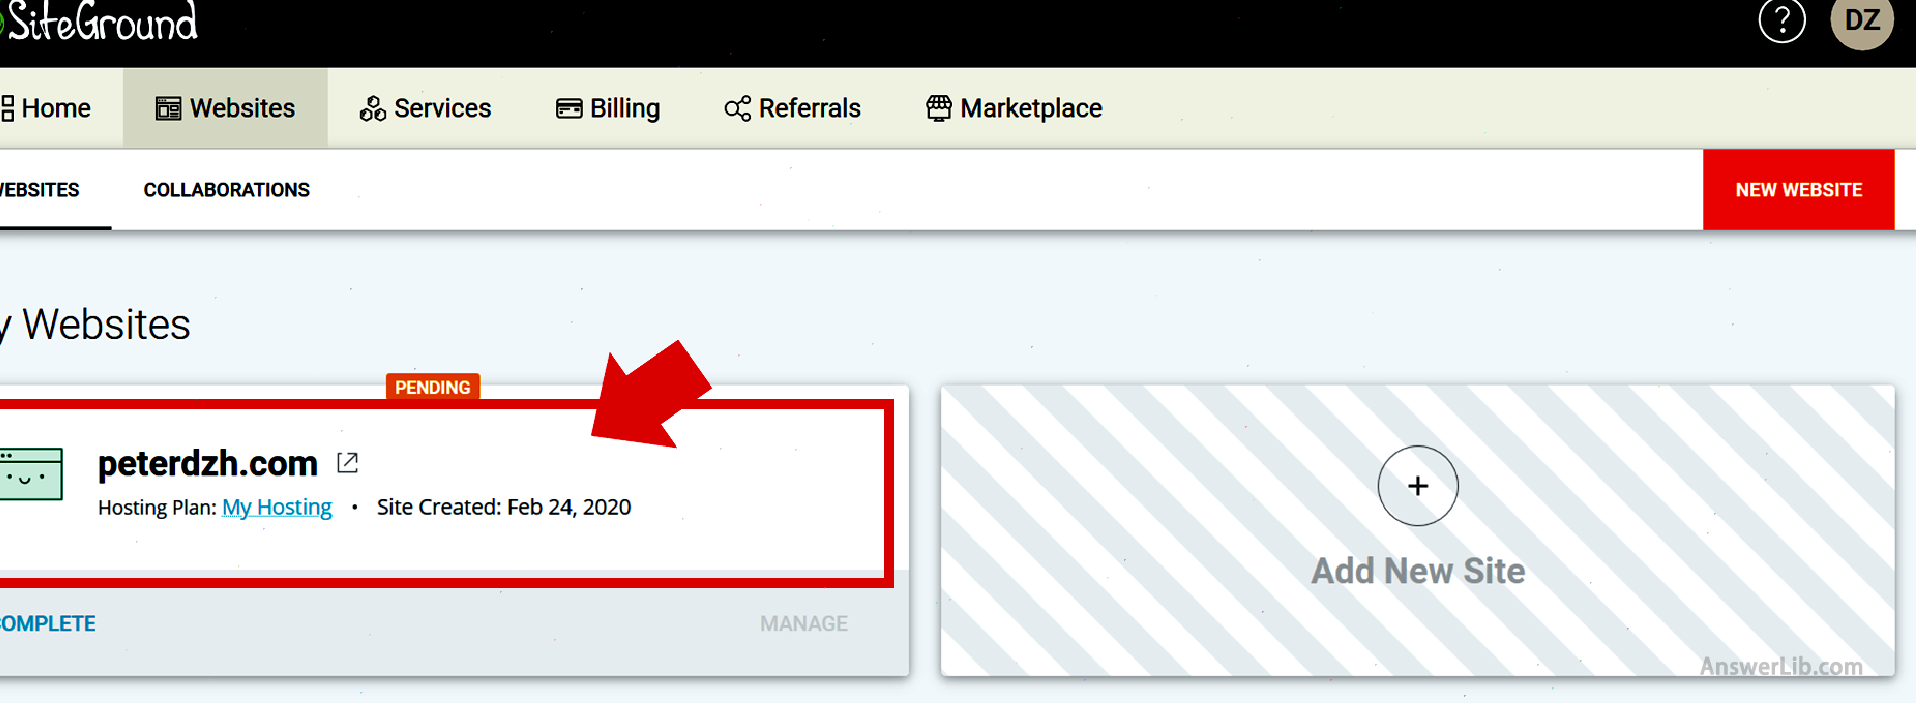
In the host account, find the second option of the menu bar [websites];

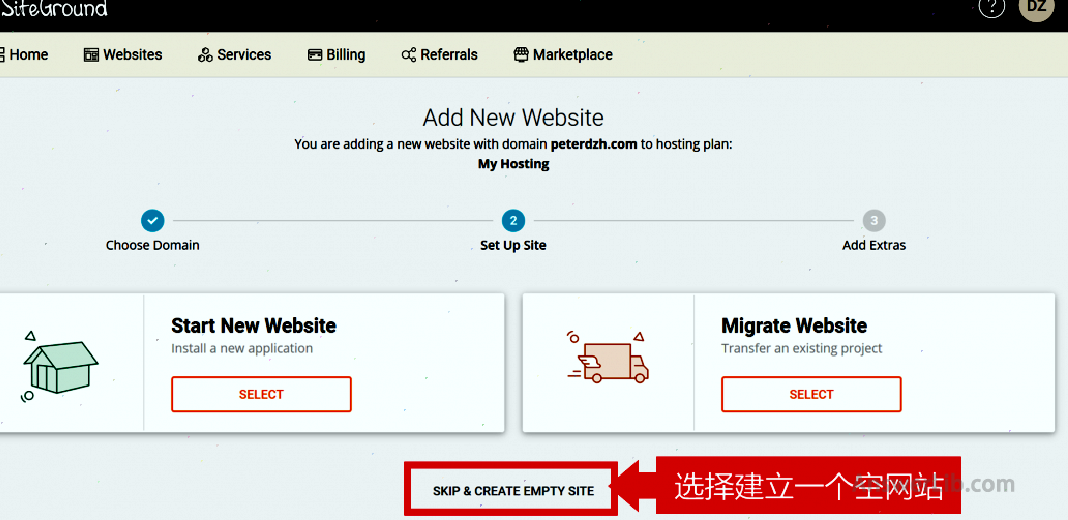
Find the website domain name we filled in when buying the host.Take peterdzh.com as an example:
Then select the bottom option at the bottom of the page [SKIP & Create Empty Site], and then we add content to the website;
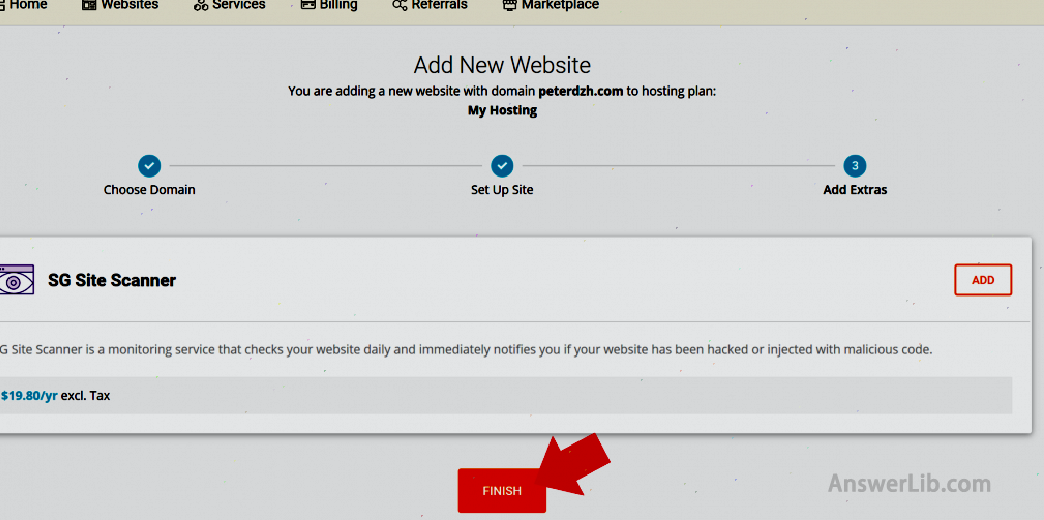
In the figure below, click the button [Finish] to complete the website added;
So far, you have successfully applied for the website host and simply set the domain name.
Reader benefits
If you like our tutorial and want to get updated learning materials, please subscribe, and get exclusive technical information as soon as possible:
Follow-up
Applying for the host is the second step of the website.So far, you already have your own website domain name, and you have also applied for the website host.
In the next step, we need to connect the website domain name to the website host.This process is called “domain name analysis”.
Please continue reading:
Next step:Detailed explanation of domain name analysis-point the domain name to the website server host
common problem
What host should we choose to build a WordPress website?To build a website with WordPress, you need to choose a host for WordPress.Here we recommend it Siteground host, Dedicated to WordPress, the price is reasonable.
How about siteGround?Siteground host It is one of the most popular hosts in the WordPress community and one of the consoles recommended by WordPress.Siteground is loved by high-quality services such as 24/7 customer service, automatic PHP update, system-level optimization and acceleration, free CDN and SSL security certificates.
Is it convenient to use SiteGround?The Siteground host uses the background interface of independent development.It is very convenient to use, more humane and easier to get started than the traditional CPANEL.