What is Cloudflare? Cloudflare provides DNS (Domain NameServer) security protection and CDN (Content Delivery Network) content distribution network services for the WordPress website to distribute network services to maximize the security of the website and increase the speed of visiting websites from all over the world.
In this CloudFlare tutorial, we will explain in detail the registration, DNS settings and usage methods of Cloudflare.
Your currently visited blog webpage 【American Life Guide】 The Cloudflare acceleration and protection technology is used, and it is used in conjunction WP Rocket Acceleration Plug-in [View WP Rocket Tutorial] The systemic WordPress website accelerate [View free tutorial], Make the website loading speed of ten times the speed.
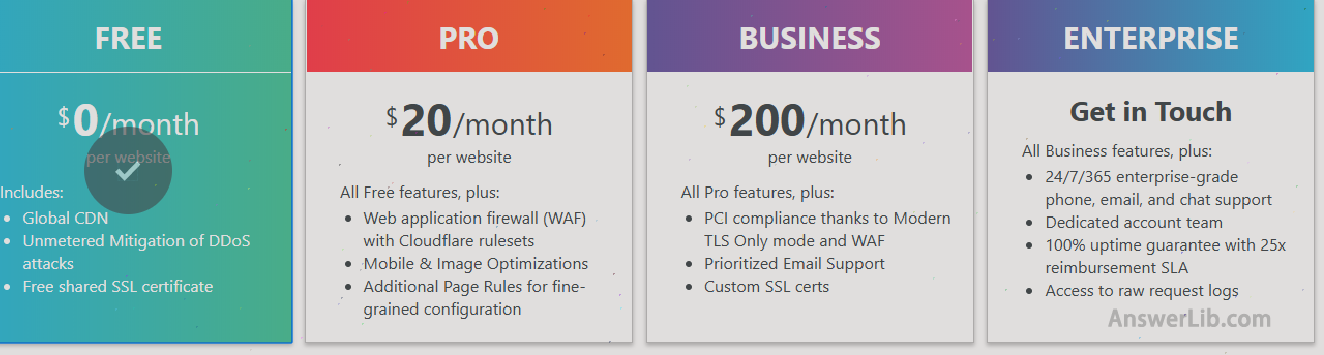
Cloudflare price
Cloudflare provides a variety of different services and prices.The CDN and website protection services are completely free.If you need to use more service items, you can choose Pro or Business Plan.The price is $ 20/month and $ 200/month.The specific price table is shown in the figure below:
register account
Log in Cloudflare homepage, Click the button in the upper right corner [Sign Up], register a new Cloudflare account for free, as shown in the figure below.The registration process is relatively simple, and you need to enter your name, address and other information, so we won’t say much here.

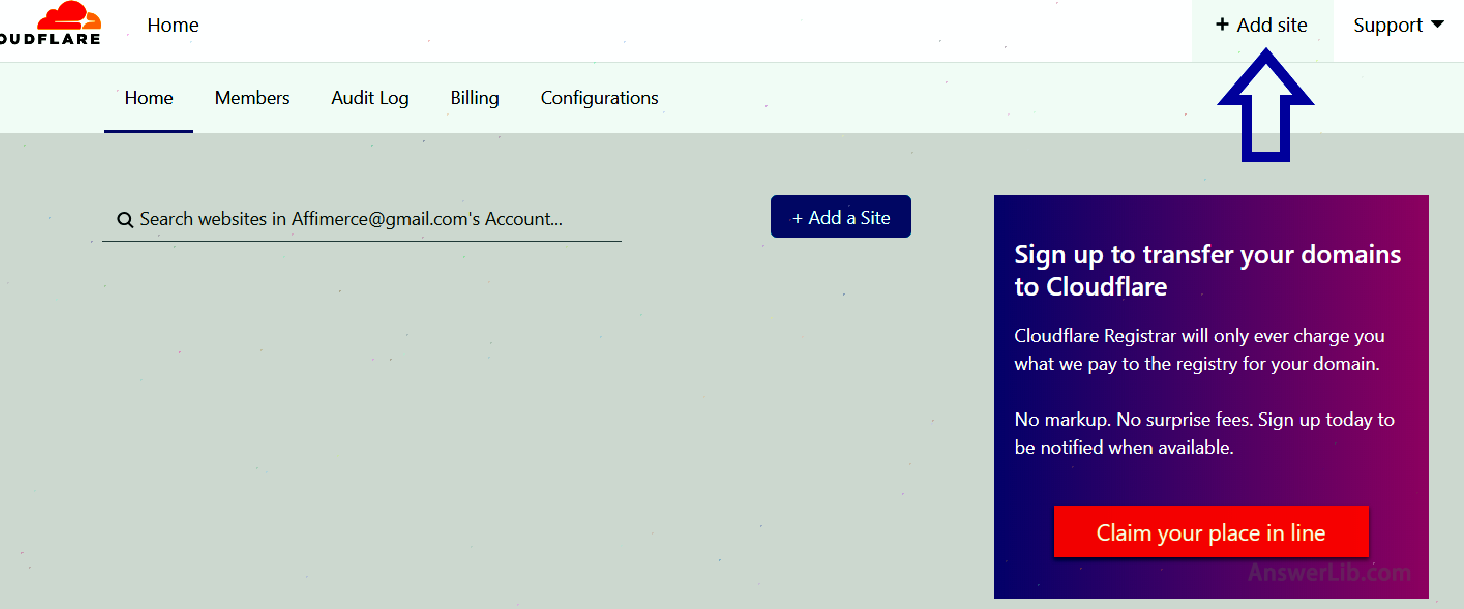
Add website domain name address
After registering the Cloudflare account, log in to your account.Below, let’s add a website domain name that needs to be protected and accelerated.In your Cloudflare account, click the button [Add Site] in the upper right corner, as shown in the figure below:
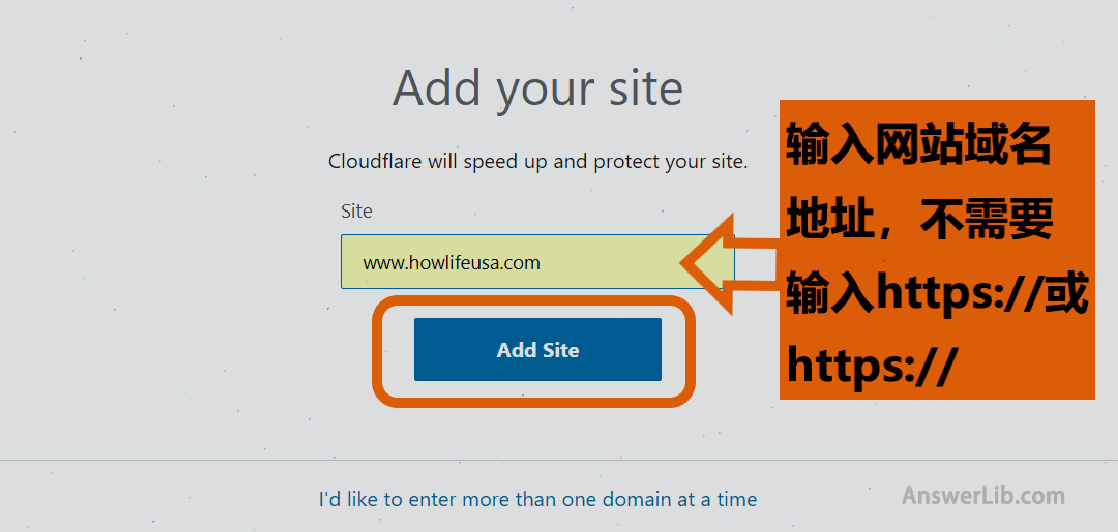
After clicking, a new page will pop up.Please enter your website domain name address, and then click the bottom button [add site], as shown in the figure below:
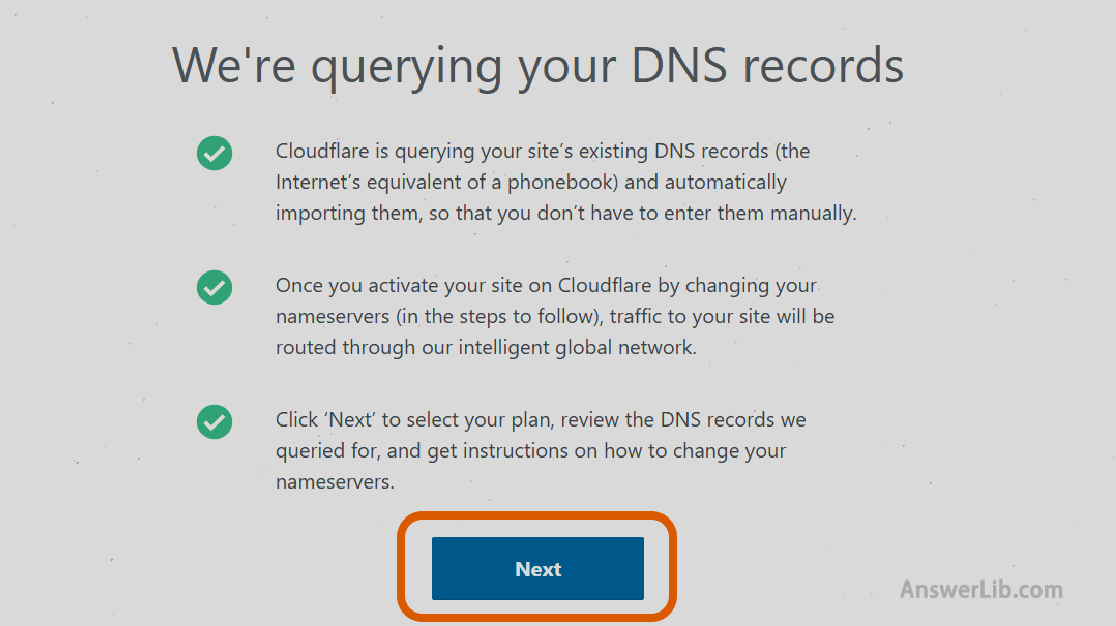
Cloudflare Get the DNS address of your website
When you add the website domain name address, Cloudflare will automatically retrieve the DNS information of the website domain name in the next step.In this step, you don’t need to make any settings.Please click the bottom button [Next]:
Select service items and prices
After that, you have the opportunity to choose the services and prices that need to be used.
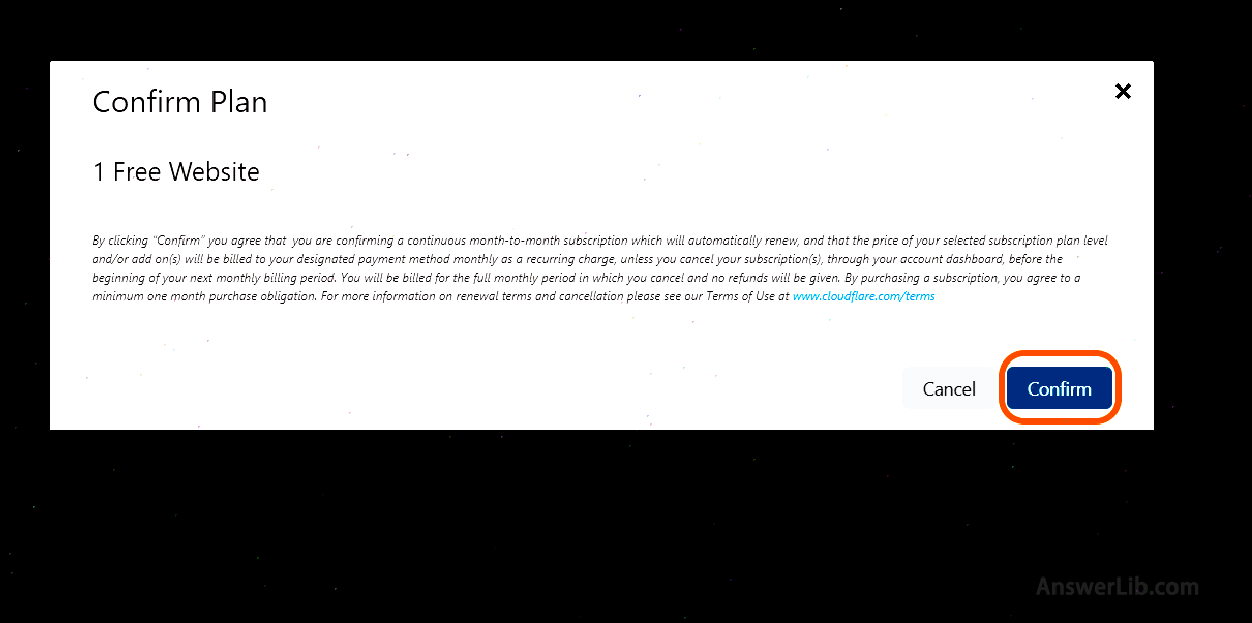
A new page will jump out.You need to click the button [Confirm] to confirm your choice again, as shown in the figure below:
Set the project of cloudflare in DNS
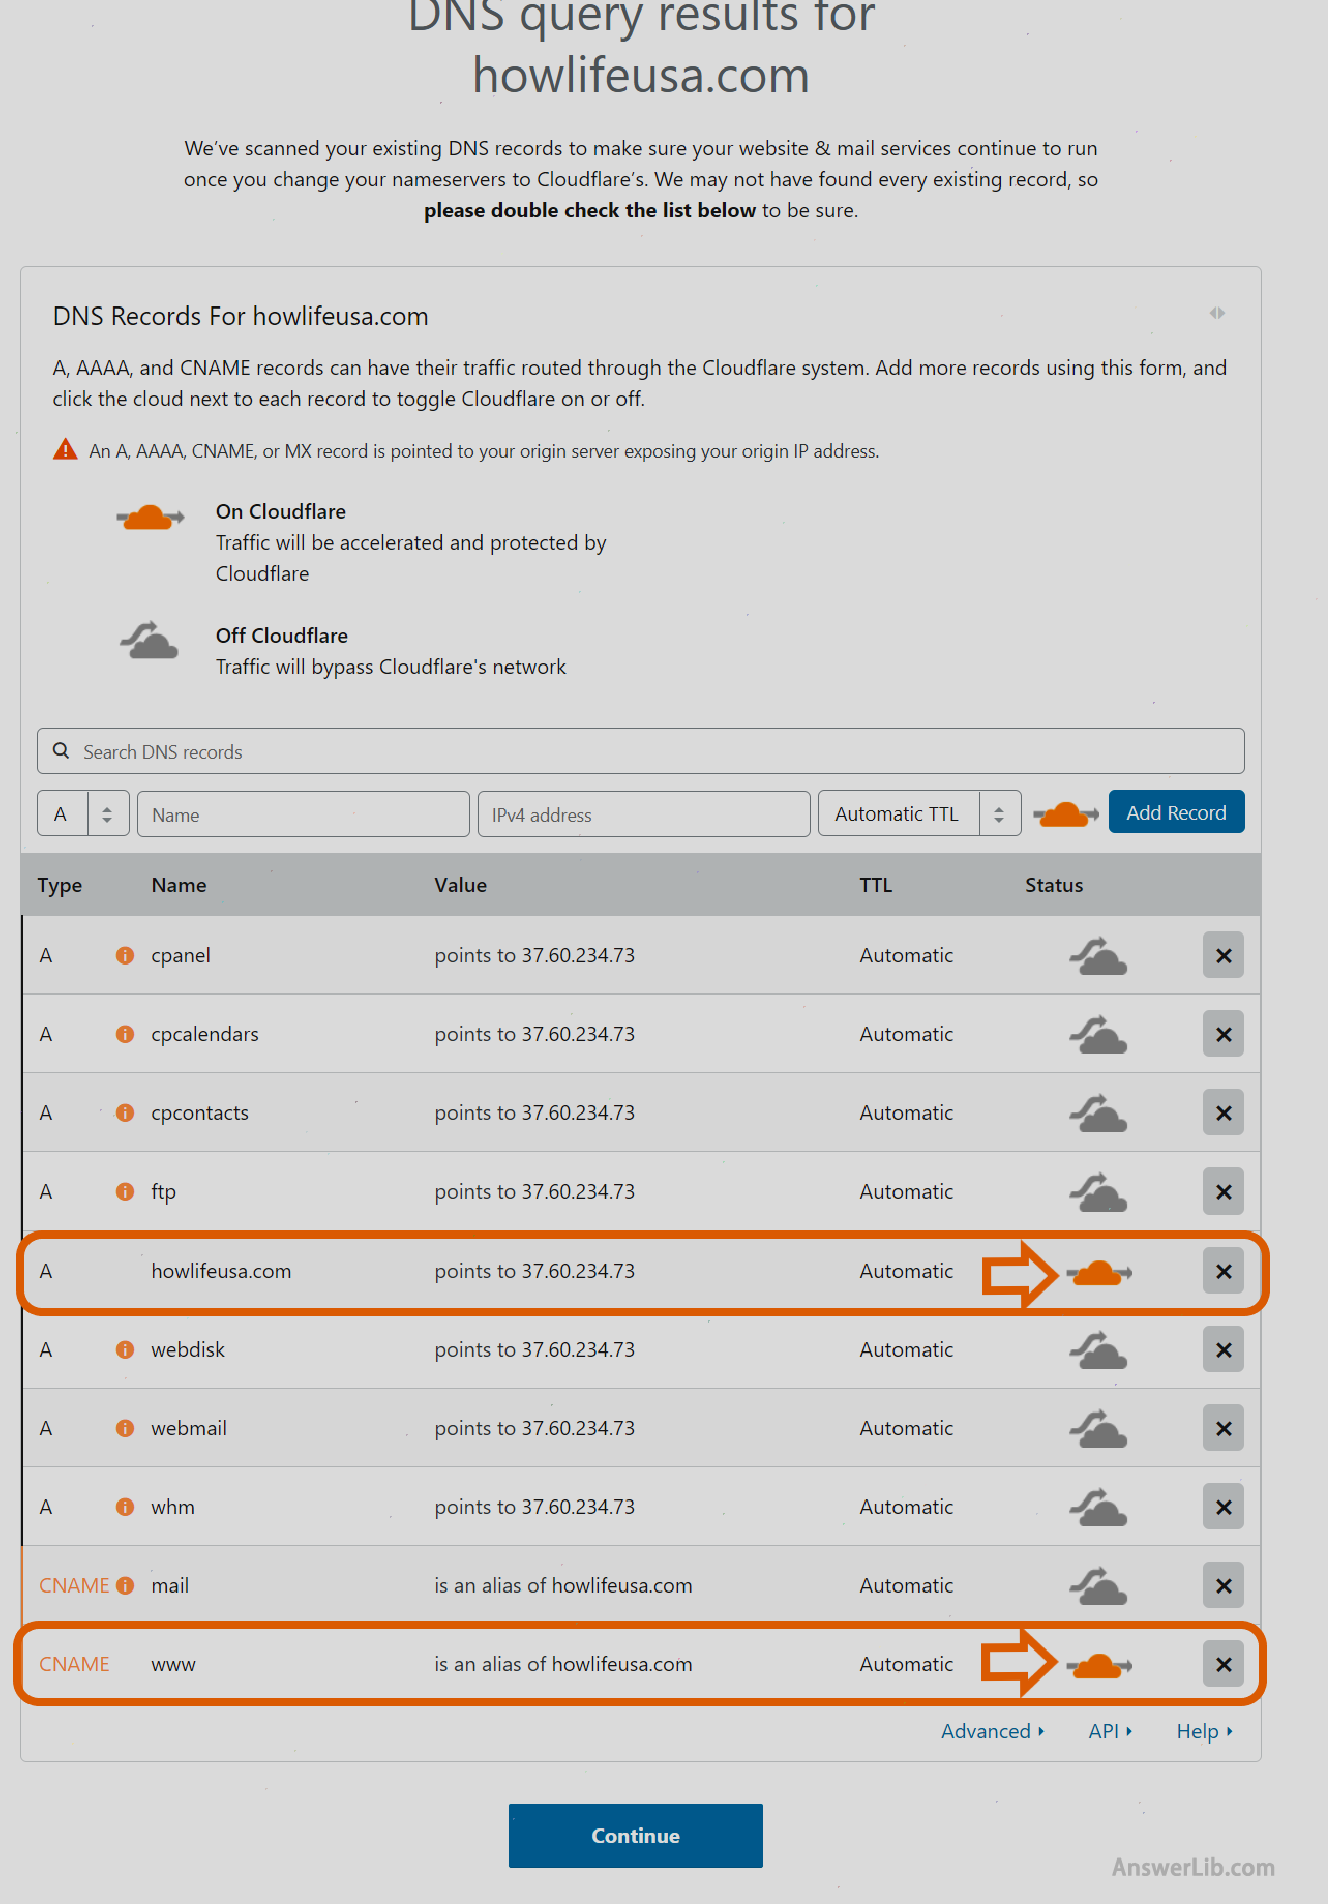
On this page, Cloudflare will list the DNS-related data scanned.In the following example, there are two records that will use the CloudFLARE service: one is the main domain name howlifeusa.com, and the other is the www sub-domain name (www leadership (www.The domain name is actually a sub-domain name of the website).You can see that the “STATUS” in the list is bright orange.Here, you don’t need to make any modifications, directly click the bottom button [Continue].
Complete the settings of Cloudflare DNS
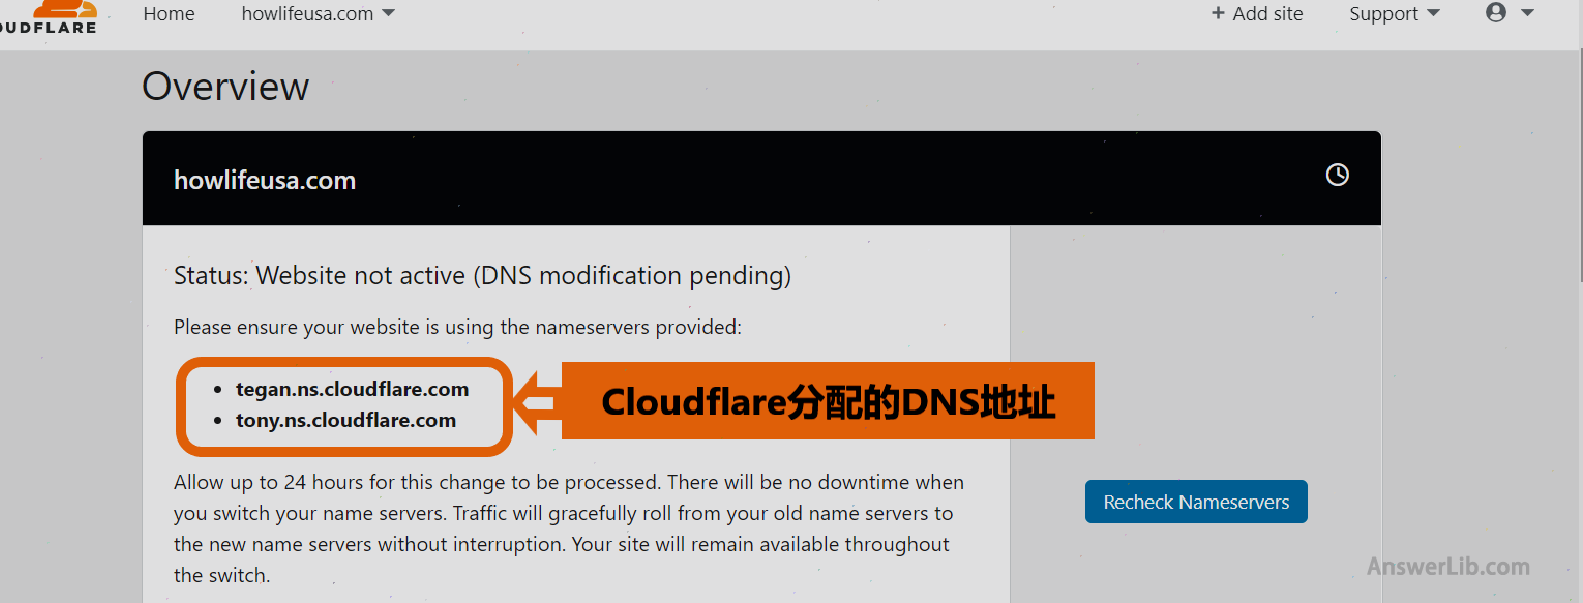
At this step, you will see that Cloudflare allocates a new DNS address for your website, and the original virtual host address of the website will be automatically assigned with the DNS host assigned by Cloudflare (on the right side of the figure below)Matching.In this step, you don’t need to make any settings, directly click the bottom button to enter the next step.

At this point, you complete the addition of the website and the CloudFlare DNS settings.You will enter the following page:
Log in to the website domain name service provider update the DNS address
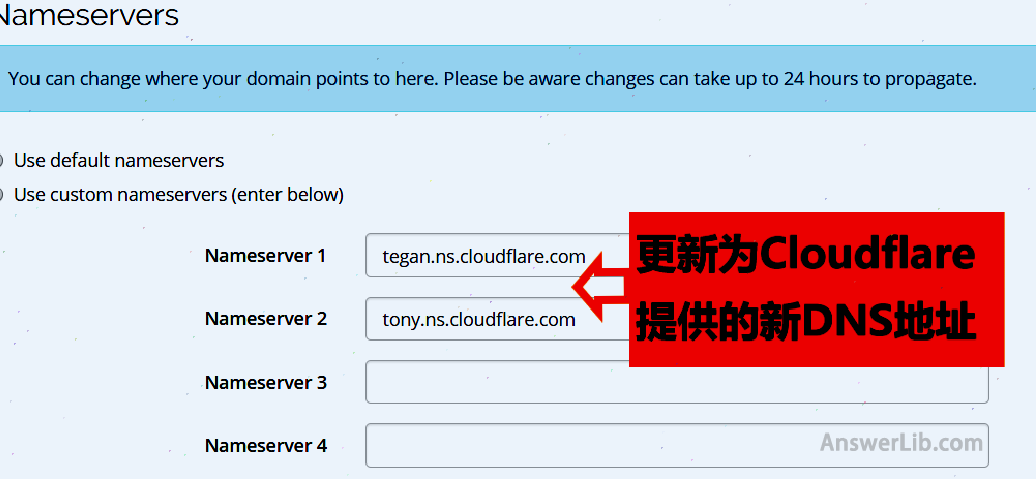
You need to return to your registered network domain name service provider (for example Seohost,, Namecheap), Log in to domain name management, change the DNS settings of the domain name.For different domain name service providers, the modification methods will be different.Here is a SEOHOST as an example.Log in to the account, find the domain name management option, enter the settings of nameServers, update the original virtual host address to the DNS address assigned by Cloudflare:


View the update in the Cloudflare account
Back to the Cloudflare account, click the button [Reched NameServers] to see if the settings of the Cloudflare DNS are successfully completed.
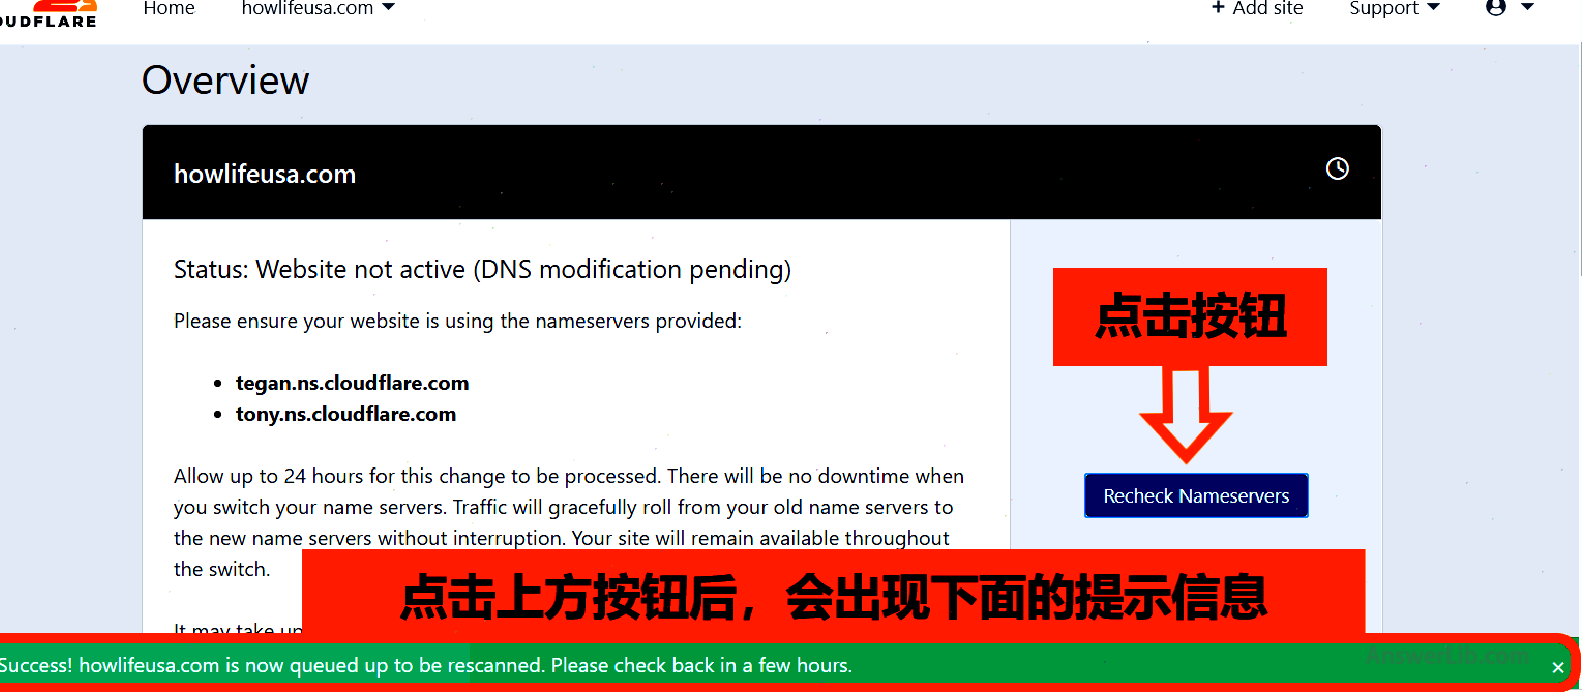
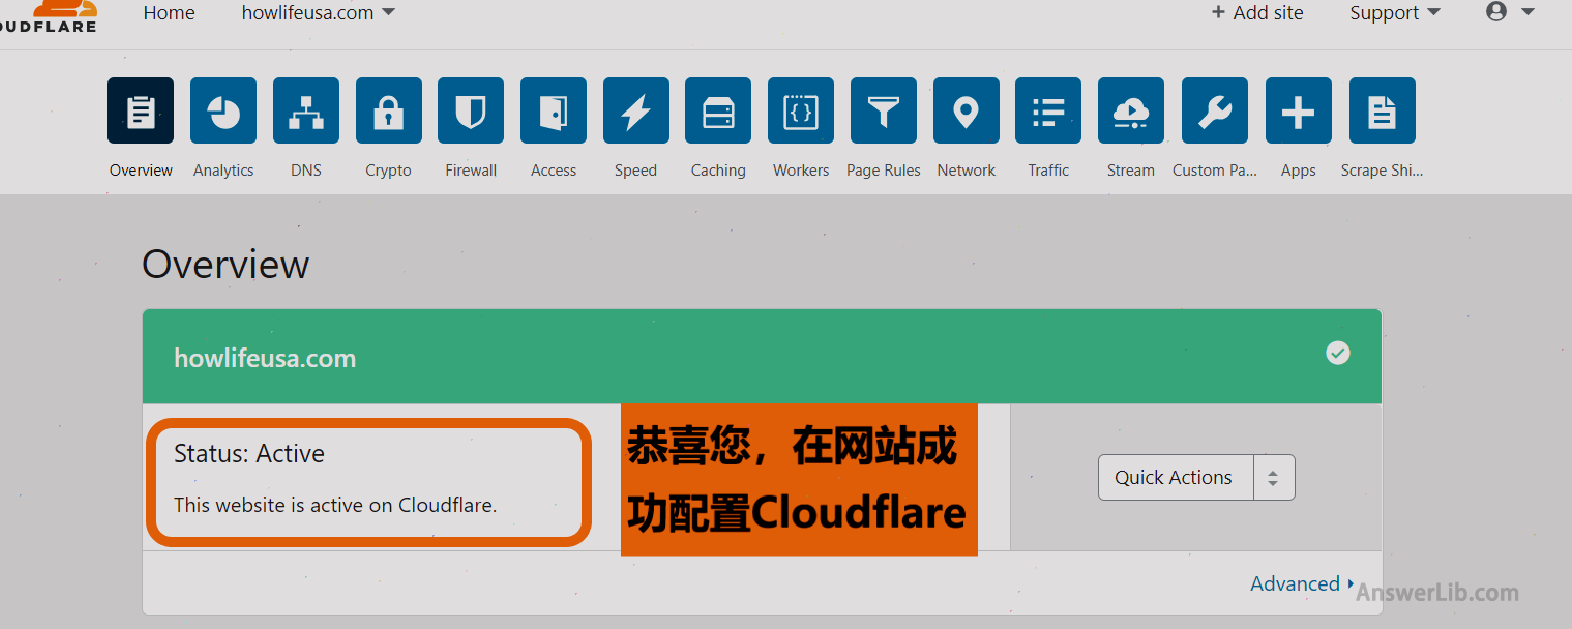
After a few minutes (sometimes it takes a few hours), the page will be updated as the following page, and the cloudflare configuration is finally completed.
Conclusion
Congratulations to you, successfully configure Cloudflare for the website, so as to provide free security protection and CDN services!
If you plan to use WP Rocket, you can seamlessly integrated Cloudflare in WP Rocket and use it with other accelerated items provided by WP Rocket, which is simply “Yi Tian Tu Dragon”.
It should be pointed out that the use of Cloudflare is only part of the systemic WordPress speed optimization.You also need to comprehensively comprehensively, such as increasing the virtual host response speed, using AMP technology, etc.to comprehensively accelerate the website.
Please see what we write [WordPress speed optimization: website loading speed from 11 seconds to 1 second fly over], Master the Raiders of the website acceleration.
Please use the mailbox to subscribe to the “American Life Guide” below to track more technologies related to the WordPress website.